Moving to a new apartment usually means one thing for a ham radio operator: your shack goes offline, your antennas come down, and your local nodes sit in a box gathering dust. After a long hiatus from the AllStarLink network due to a recent move, I finally decided it was time to get back on the air.
However, instead of digging out hardware interfaces and setting up physical radio gateways, I wanted a modern, pure-digital approach (temporary). The plan was simple: run an AllStarLink 3 (ASL3) node inside a Docker container on my home Proxmox VE cluster, and use the DVSwitch Mobile app on my phone to connect. Quick, clean, no hardware required.
Or so I thought.
If you’re running Proxmox and planning to use the official ASL3 Docker image inside a standard LXC container, you are about to hit a major brick wall. Here is how to navigate the pitfalls, understand the underlying kernel issues, and get your digital node running perfectly.
The Pitfall: Double Virtualization & The DAHDI Trap
Even if you configure your node to be purely digital with zero physical radio interfaces, ASL3’s core engine (app_rpt.so) still relies heavily on Asterisk’s internal timing mechanisms, which traditionally depend on DAHDI (Digium Asterisk Hardware Device Interface) kernel modules.
The official ASL3 Docker image is built to automatically compile these DAHDI modules against the host kernel during boot using DKMS. This works fine on a bare-metal Debian server. But when you try to run this Docker container inside a standard, secure, Unprivileged Proxmox LXC, the environment is isolated from the host kernel.
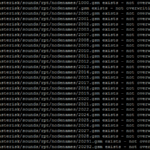
The container’s entrypoint script will fail to compile the modules, leading to an immediate crash loop:
/asl3/asl3.sh: line 6: modprobe: command not found
ERROR[13]: loader.c:2687 load_modules: res_timing_dahdi declined to load.
ERROR[13]: loader.c:2687 load_modules: Failed to resolve dependencies for app_rpt
ERROR[13]: asterisk.c:4123 check_init: Module initialization failed. ASTERISK EXITING!
Asterisk panics because it cannot satisfy app_rpt‘s dependencies, and your container dies within a second of spinning up.
The Solution: A Dedicated Privileged LXC
To give Docker the necessary permissions to interface with kernel-level mechanisms and compile the dummy timing channels, you need to dedicate a Privileged LXC container to this setup.
1. Provisioning the LXC
When creating your new Debian-based LXC container in Proxmox, make sure to:
- Uncheck the “Unprivileged container” option during creation (forcing
unprivileged=0). - Assign it a static IP address in your local subnet.
Before hitting the power button, navigate to the container’s Options -> Features tab in the Proxmox web GUI and enable:
nesting(absolute must for running Docker inside LXC)fuse
2. Installing the Environment
Once inside your new privileged environment, update the OS and install a clean instance of Docker using the official repository script:
sudo apt remove $(dpkg --get-selections docker.io docker-compose docker-doc podman-docker containerd runc | cut -f1)

# Add Docker's official GPG key:
sudo apt update
sudo apt install ca-certificates curl
sudo install -m 0755 -d /etc/apt/keyrings
sudo curl -fsSL https://download.docker.com/linux/debian/gpg -o /etc/apt/keyrings/docker.asc
sudo chmod a+r /etc/apt/keyrings/docker.asc

# Add the repository to Apt sources:
sudo tee /etc/apt/sources.list.d/docker.sources <<EOF
Types: deb
URIs: https://download.docker.com/linux/debian
Suites: $(. /etc/os-release && echo "$VERSION_CODENAME")
Components: stable
Architectures: $(dpkg --print-architecture)
Signed-By: /etc/apt/keyrings/docker.asc
EOF

sudo apt update

sudo apt install docker-ce docker-ce-cli containerd.io docker-buildx-plugin docker-compose-plugin
Now, pull the official ASL3 Docker repository and spin it up. Because the LXC is privileged and has nesting enabled, the virtual DAHDI driver compilation will compile cleanly against the Proxmox host kernel:
git clone https://github.com/AllStarLink/ASL3-Docker.git
cd ASL3-Docker
docker compose up -d --build --force-recreate
A quick docker ps should show the container running stably without crashing.
Configuring a Digital HUB Node
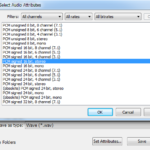
Since we aren’t mapping physical USB sound fobs or URIs into the container, we must tell ASL3 to run as a network-only hub. Leaving it on default settings will cause the audio queues to choke on missing hardware.
Launch the interactive configuration menu inside the container:
docker exec -it allstarlink3 asl-menuRun through the Local Node Configuration wizard, put in your assigned AllStar node number and callsign, and when prompted for the configuration type, choose:
HUB node w/no radio interface
This writes a lean, driverless node stanza into your rpt.conf. Once finished, restart the container from your terminal to apply the changes: docker restart allstarlink3.
The Template Gotcha (Fixing IAX Error 29)
ASL3 introduces a cleaner directory layout using templates to separate core system configurations from individual user accounts. Instead of adding extension accounts directly into iax.conf, you drop them into a separate file.
Open the custom users configuration:
docker exec -it allstarlink3 nano /etc/asterisk/custom/iax/iaxclient-users.conf
Following the repository template guidelines, you can append a block using your callsign as the section username. However, during my setup, the mobile client consistently threw a Registration Refused (Cause Code 29) error.
The fix is explicitly forcing the dialplan context inside the custom user block, as the template sometimes fails to inherit it properly down to the include file. Make sure your block looks like this:
[YOUR_CALLSIGN](iaxclient)
secret = YourSecurePassword
callerid = "YOUR_CALLSIGN"
Save, exit, and restart the container to reload Asterisk: docker restart allstarlink3.
Going Remote
To make the setup useful when you are away from home and on cellular data, you just need to open a single port.
IAX2 is highly efficient and packages both control and audio data over a single UDP port.
On your router, map a Destination NAT rule for UDP port 4569 pointing directly to the static internal IP of your Proxmox LXC container.
In your mobile client (like DVSwitch Mobile), configure your profile using your callsign as the username, your defined secret, and point the host address to your home’s public IP or DDNS domain.
Once connected, you can use the app’s DTMF keypad to cross-connect to reflectors, hubs, and other nodes worldwide using standard commands (e.g., *3<node> to connect, *1<node> to disconnect).
It feels great to have my node back online, completely self-hosted, and accessible right from my pocket.
73!