AllStar to DMR bridge
Intro
Few days ago I talked to 4X1DA and he challenged me to try something new with Allstar.
It was new way to bridge DMR to Allstar without any hardware (expect of RPi).
I was wondered how such thing can work without any hardware but some good people did the trick and I can say that it’s working great.
Let’s do it
DISCLAIMER:
You’re doing it on your own risk. I’m not responsible for any of those things (damage or legal problems).
So I found this Google Docs file (I guess it’s from N4IRS) which have detailed steps how to make this magic happen.
I guess the file will be changed in the near future because I found some different settings that I needed to change from the original instructions.
The file I used can be downloaded here.
I’ll write the main points and skip most of the debugging steps, if you need more information look at the files.
Hardware
You’ll need Raspberry Pi, I’ve used RPi3.
Or you can use some kind of VPS to host the node.
Digital Ocean is good option, I would appreciate if you register with my referral link:
https://m.do.co/c/88a0fc96f7a6
The structure
It’s pretty simple if you already have some experience with the Allstar system.
The bridge includes few parts:
- Your node – which is publicly available as regular node.
- Private node – runs internally and cannot be accessed from outside or other nodes.
- Bridge software – makes the conversion between analog to digital and vice versa.
On the two ends are Allstar system and Brandmeister.
Image
If you start from fresh (as I did) you’ll need to flash the Allstar Image (not the one from Crompton).
The image can be found here: Allstar Image for RPi
You can use Etcher to flash the image on a MicroSD card.
After inserting the card and booting, log in the system with username: repeater
and password: allstarlink via SSH (port 22).
Next, let’s do some updates:
sudo apt-mark hold raspberrypi-kernel-headers raspberrypi-kernel
sudo apt-get update
sudo apt-get upgrade -y
sudo reboot
After the reboot you can log in again and enter:
sudo asl-menu
This will prompt the configuration menu.
Enter to the first time menu and change you password.
Then continue with all the necessary steps to configure the node properly.
On the menu choose option 2 (unless you want to change more stuff like network settings, then choose 1).
Then A1 and inside change N1, N2, N3 and N4.
N4 should be I4 (No radio).
Then hit save (AZ) and it’ll probably reboot itself.
Asterisk
Gain root access by typing sudo -s
Then stop the Asterisk service with systemctl stop asterisk
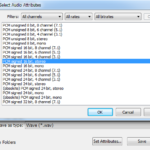
Edit the /etc/asterisk/rpt.conf file, you can use WinSCP.
Note:
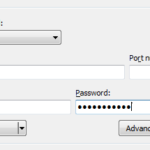
If you use WinSCP you’ll need to configure it to use root access:
- Choose SCP and type the IP, username and password.
- Click on Advanced… and find the SCP/Shell.
- Enter
sudo -son the Shell field. - Connect.
Now copy the part below and paste it before your node configuration, under the ;;;;;;;;;;;;;;;;;;;;;;;;;;;;;;;;;;;;;;;;;;;;;;;;;;;;;;;; line.
[1999]

rxchannel = USRP/127.0.0.1:34001:32001  ; Use the USRP channel driver. Must be enabled in modules.conf

; 127.0.0.1 = IP of the target application

; 34001 = UDP port the target application is listening on

; 32001 = UDP port ASL is listening on

duplex = 0				; 0 = Half duplex with no telemetry tones or hang time. Ah, but Allison STILL talks!

hangtime = 0				; squelch tail hang time 0

althangtime = 0				; longer squelch tail hang time 0

holdofftelem = 1			; Hold off all telemetry when signal is present on receiver or from connected nodes

; except when an ID needs to be done and there is a signal coming from a connected node.

telemdefault = 0			; 0 = telemetry output off. Don't send Allison to DMR !!!!!!!!!!!!!!!!! Trust me.

telemdynamic = 0			; 0 = disallow users to change the local telemetry setting with a COP command,

linktolink = no				; disables forcing physical half-duplex operation of main repeater while

; still keeping half-duplex semantics (optional)

nounkeyct = 1 ; Set to a 1 to eliminate courtesy tones and associated delays.

totime = 180000 ; transmit time-out time (in ms) (optional, default 3 minutes 180000 ms)

idrecording = |ie ; id recording or morse string see http://ohnosec.org/drupal/node/87

idtalkover = |ie ; Talkover ID (optional) default is none see http://ohnosec.org/drupal/node/129
This part configures our private node #1999.
Now find [nodes] and paste this line inside under your node line:
1999 = [email protected]:4569/1999,NONE
Save and find the modules.conf file.
Search for chan_usrp.so and remove the “no” before the “load”.
Save and move to extensions.conf file.
Find [globals] and add NODE1 = 1999 under your node line.
Find [radio-secure] add exten => ${NODE1},1,rpt,${NODE1}
You can now use IAX-RPT or your radio to connect to 1999 and check on the Allstar status page (http://RPI.IP.ADDRESS/cgi-bin/lsnodes_web?node=NODE-NUMER)
DVSwitch
Next, is the magic package that makes everything work.
Type apt-get update
Then apt-get install dvswitch -y
Go to /opt/MMDVM_Bridge and edit MMDVM_Bridge.ini
Change your callsign and ID (your DMR ID + two digits for SSID just add 10) under [general].
Find [DMR] and change Enable to 1
Find [DMR_Network] change Enable to 1 and change the Address to you local BM server.
(You can change the Info section if you want).
Run ./MMDVM_Bridge MMDVM_Bridge.ini and check the lines in the end.
You should see that you’re connected to the BM server.
Go to https://brandmeister.network/ and log into your account (if you don’t have you’ll need to register and wait until they confirm your account).
On the left go to Self-Care and find My hotspots, expand it and click on your fresh node with the SSID digits (If it’s green you’re connected, you might need to refresh and re-login to see the new hotspot).
Next find Static Talkgroups and write on the left input field the TG you want to use then click on the left arrow.
Now you can kill the MMDVM_Bridge service by hitting CTRL+C.
Browse to /opt/Analog_Bridge and edit Analog_Bridge.ini
Find [General] and change the decoderFallBack to true.
Go to [AMBE_AUDIO] and change the gatewayDMRId to your DMR ID w/o SSID and repeaterID to your DMR ID with the SSID.
Also change the txTg to the BM TG you configured on BM before.
This where things went wrong for me as I found that the ports on the DMR and Analog bridges are not the same so change it like this:
fromDMRPort = 31100
toDMRPort = 31103
Now you’ll need to connect the private node to your public node and it should work fine.
Type asterisk -c (or asterisk -r if it’s running already) then type rpt cmd YourNodeNumer ilink 3 1999
If you want your node to automatically connect to the private node go to /etc/asterisk/rpt.conf and find your node number between the brackets scroll to the startup_macro and add *31999.
Next you need to enable all the services by typing:
systemctl enable asterisk
systemctl enable analog_bridge
systemctl enable md380-emu
systemctl enable mmdvm_bridge
Just reboot and you’re done!
P.S If you’re using more than one node on different RPi’s you’ll need to read this.
If something isn’t working, follow the detailed file.
Or check the http://dvswitch.groups.io community.
73!
UPDATE:
Just did it for the second time for KD2KMP and it worked with two RPi on the same LAN.
You need to notice and change the the correct ports on iax.conf (not rpt.conf as mentioned in the PDF) and also change on the steps above for the 1999 node.
UPDATE 2:
Installed successfully on Vultr cloud for 4X1KS.
UPDATE 3:
If you need to add a password to Brandmeister just edit MMDVM_Bridge.ini and change password=passw0rd to your password.